

I am the biggest fan of paper piecing. I love taking normal things and turning it into something totally different! It's so fun to me
I took an assortment of 5 12x12 sheets of pattern paper from Restoration & School Spirit by Crate Paper and cut them in half from corner to corner. I then cut it in half again.

Continue doing this until you have 16 "slices" or triangles. Make sure to push down hard while slicing the paper on your paper trimmer. So that it cuts all 5 pieces.

Take a piece of 12x12 cardstock and roll adhesive on all over it. This will keep all your slices in place. For the next step pick one pattern paper slice from each of the sliced stacks

Once you have covered your paper, trim the sides for clean lines.
You don't have to do this, but I cut out the middle of my paper using my paper trimmer.
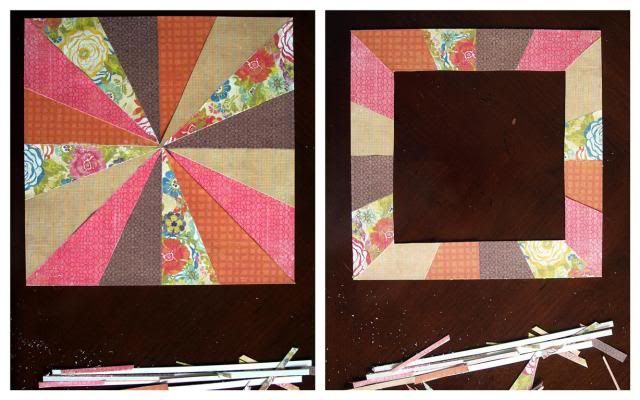
I then made a smaller frame with scallops in the center and placed foam tape on the back.
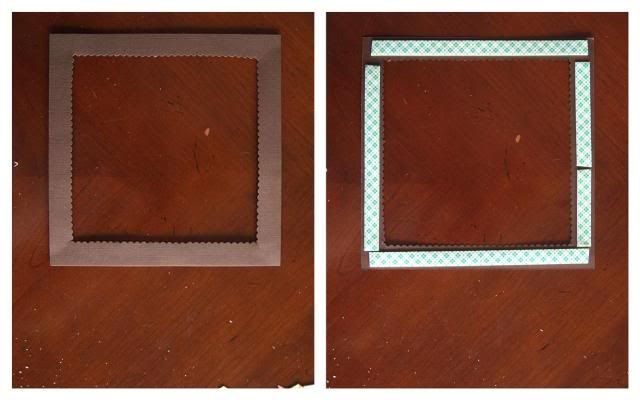
I then filled it in with paper goods and left over trimmed slices.

I then made a smaller frame with scallops in the center and placed foam tape on the back.

I then filled it in with paper goods and left over trimmed slices.

I packed in the embellishments and journaling to give a lot of depth. I made my photo Black and White so it pops.

This layout took me about 1.5 hours to make. It might be a little long for some of you, but that's just how I roll ;)
Oh and this is another layout I did with the same tech using Cosmo Circket


I hope you love this idea and have fun with it
~H

2 comments:
I LOVE that you just made a tutorial so I know how to copy!!! I'm totally going to do this because the paper makes it so much fun. I just finished scraping 2 more pages. I'll post some soon. P.S. 1.5 hours a page is normal for me ;( I'm so s.l.o.w
GORGEOUS!! Love this technique girl!
(-: Heidi
Post a Comment